1. Begin by selecting your RFP on the All RFPs and Bookings page.

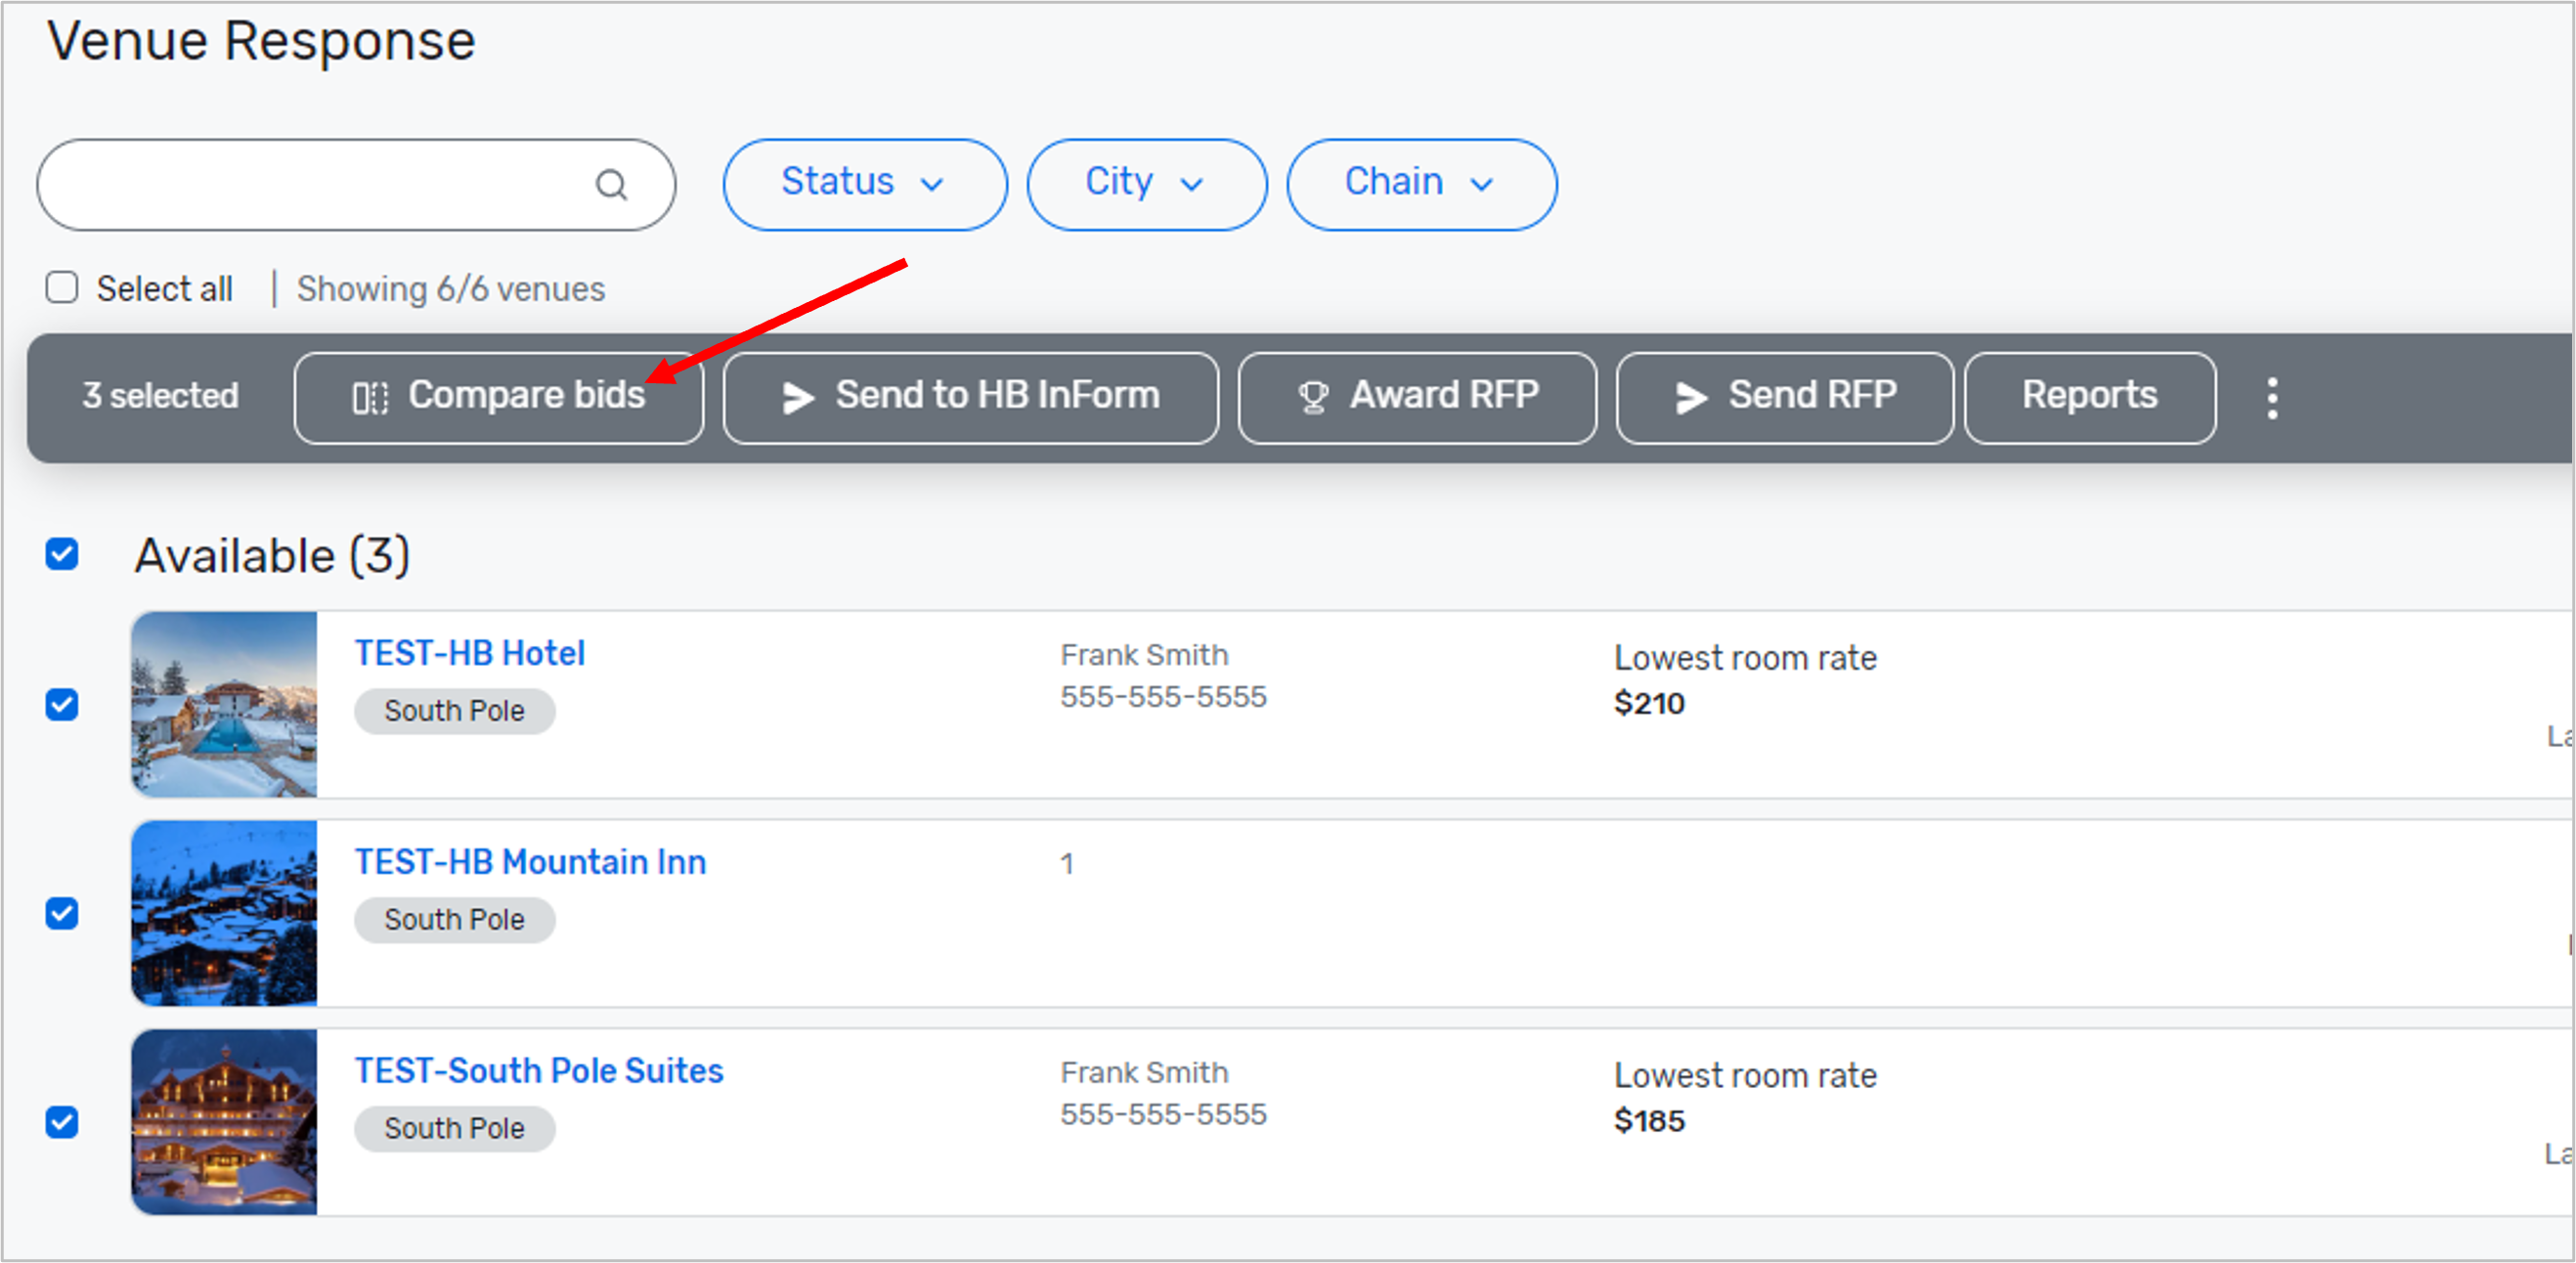
2. Select the venues you want to include by checking the boxes next to their names, then click Compare Bids from the gray bar at the top.
3. Click on the Create Template button next to HB Client.

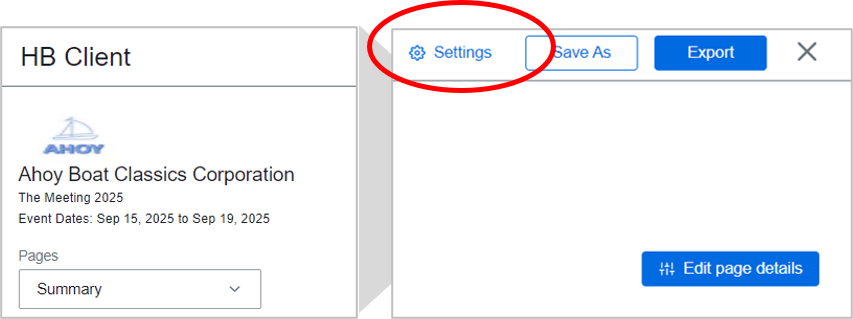
4. Configure the report settings. Start by clicking Settings in the top right. Keep all settings as is or modify grouping, language, units, headers and footers.
5. Edit Page Details on the Summary Page. Choose which response status to appear on the Summary Page. Defaulted to show only Submitted Proposals on the Summary Page.
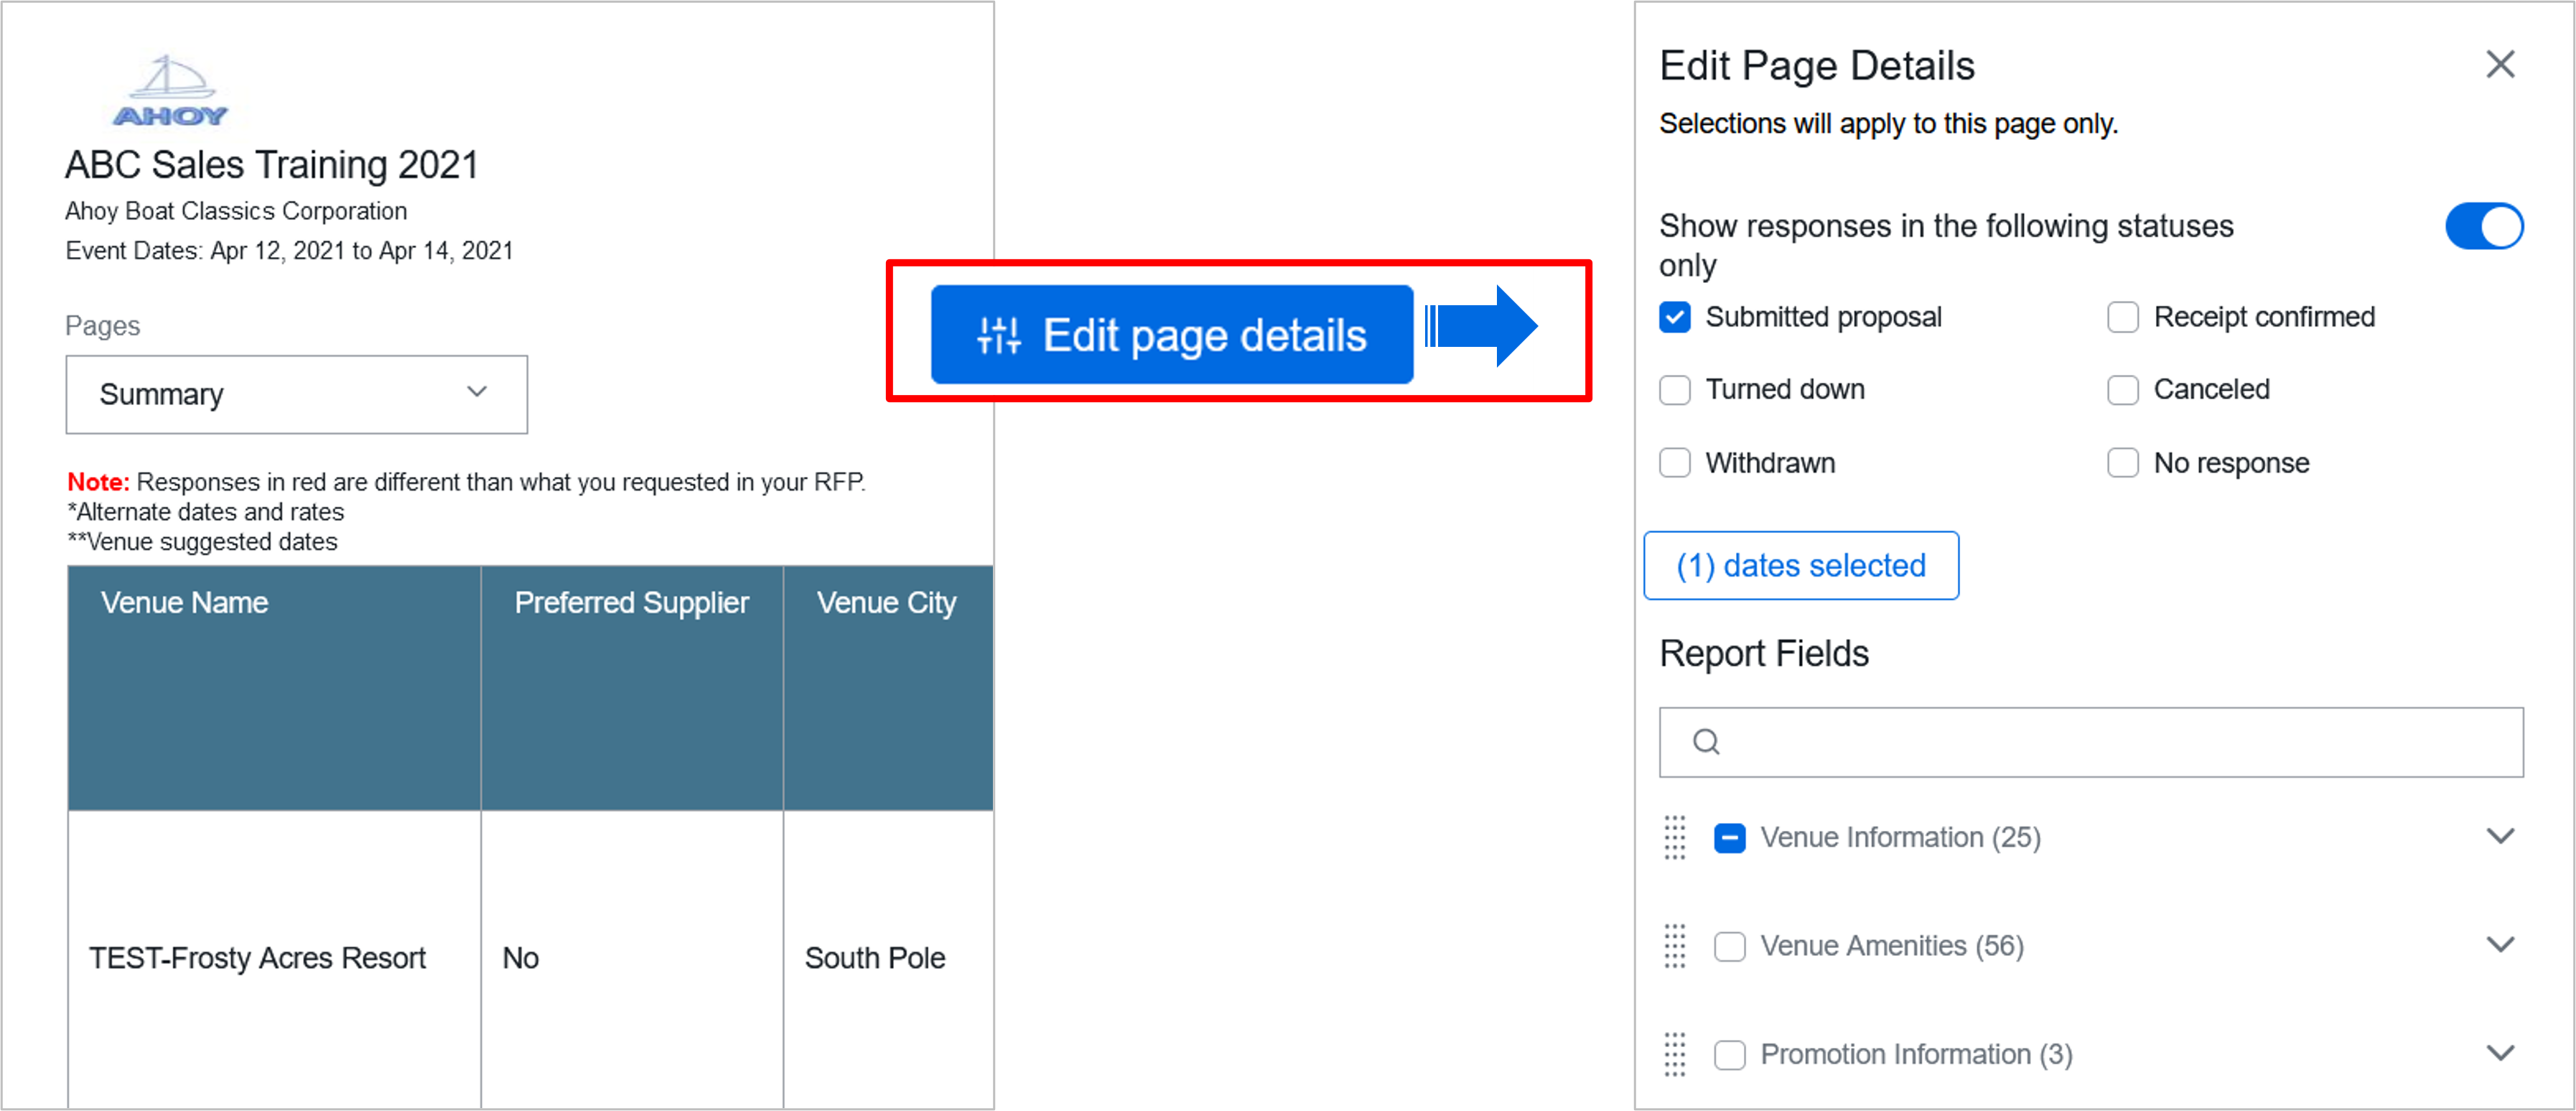
6. Edit the report fields. Under Report Fields, you can search or scroll to view a list of all the information field sections currently included in the report, such as Venue Information details, general information, or additional questions.
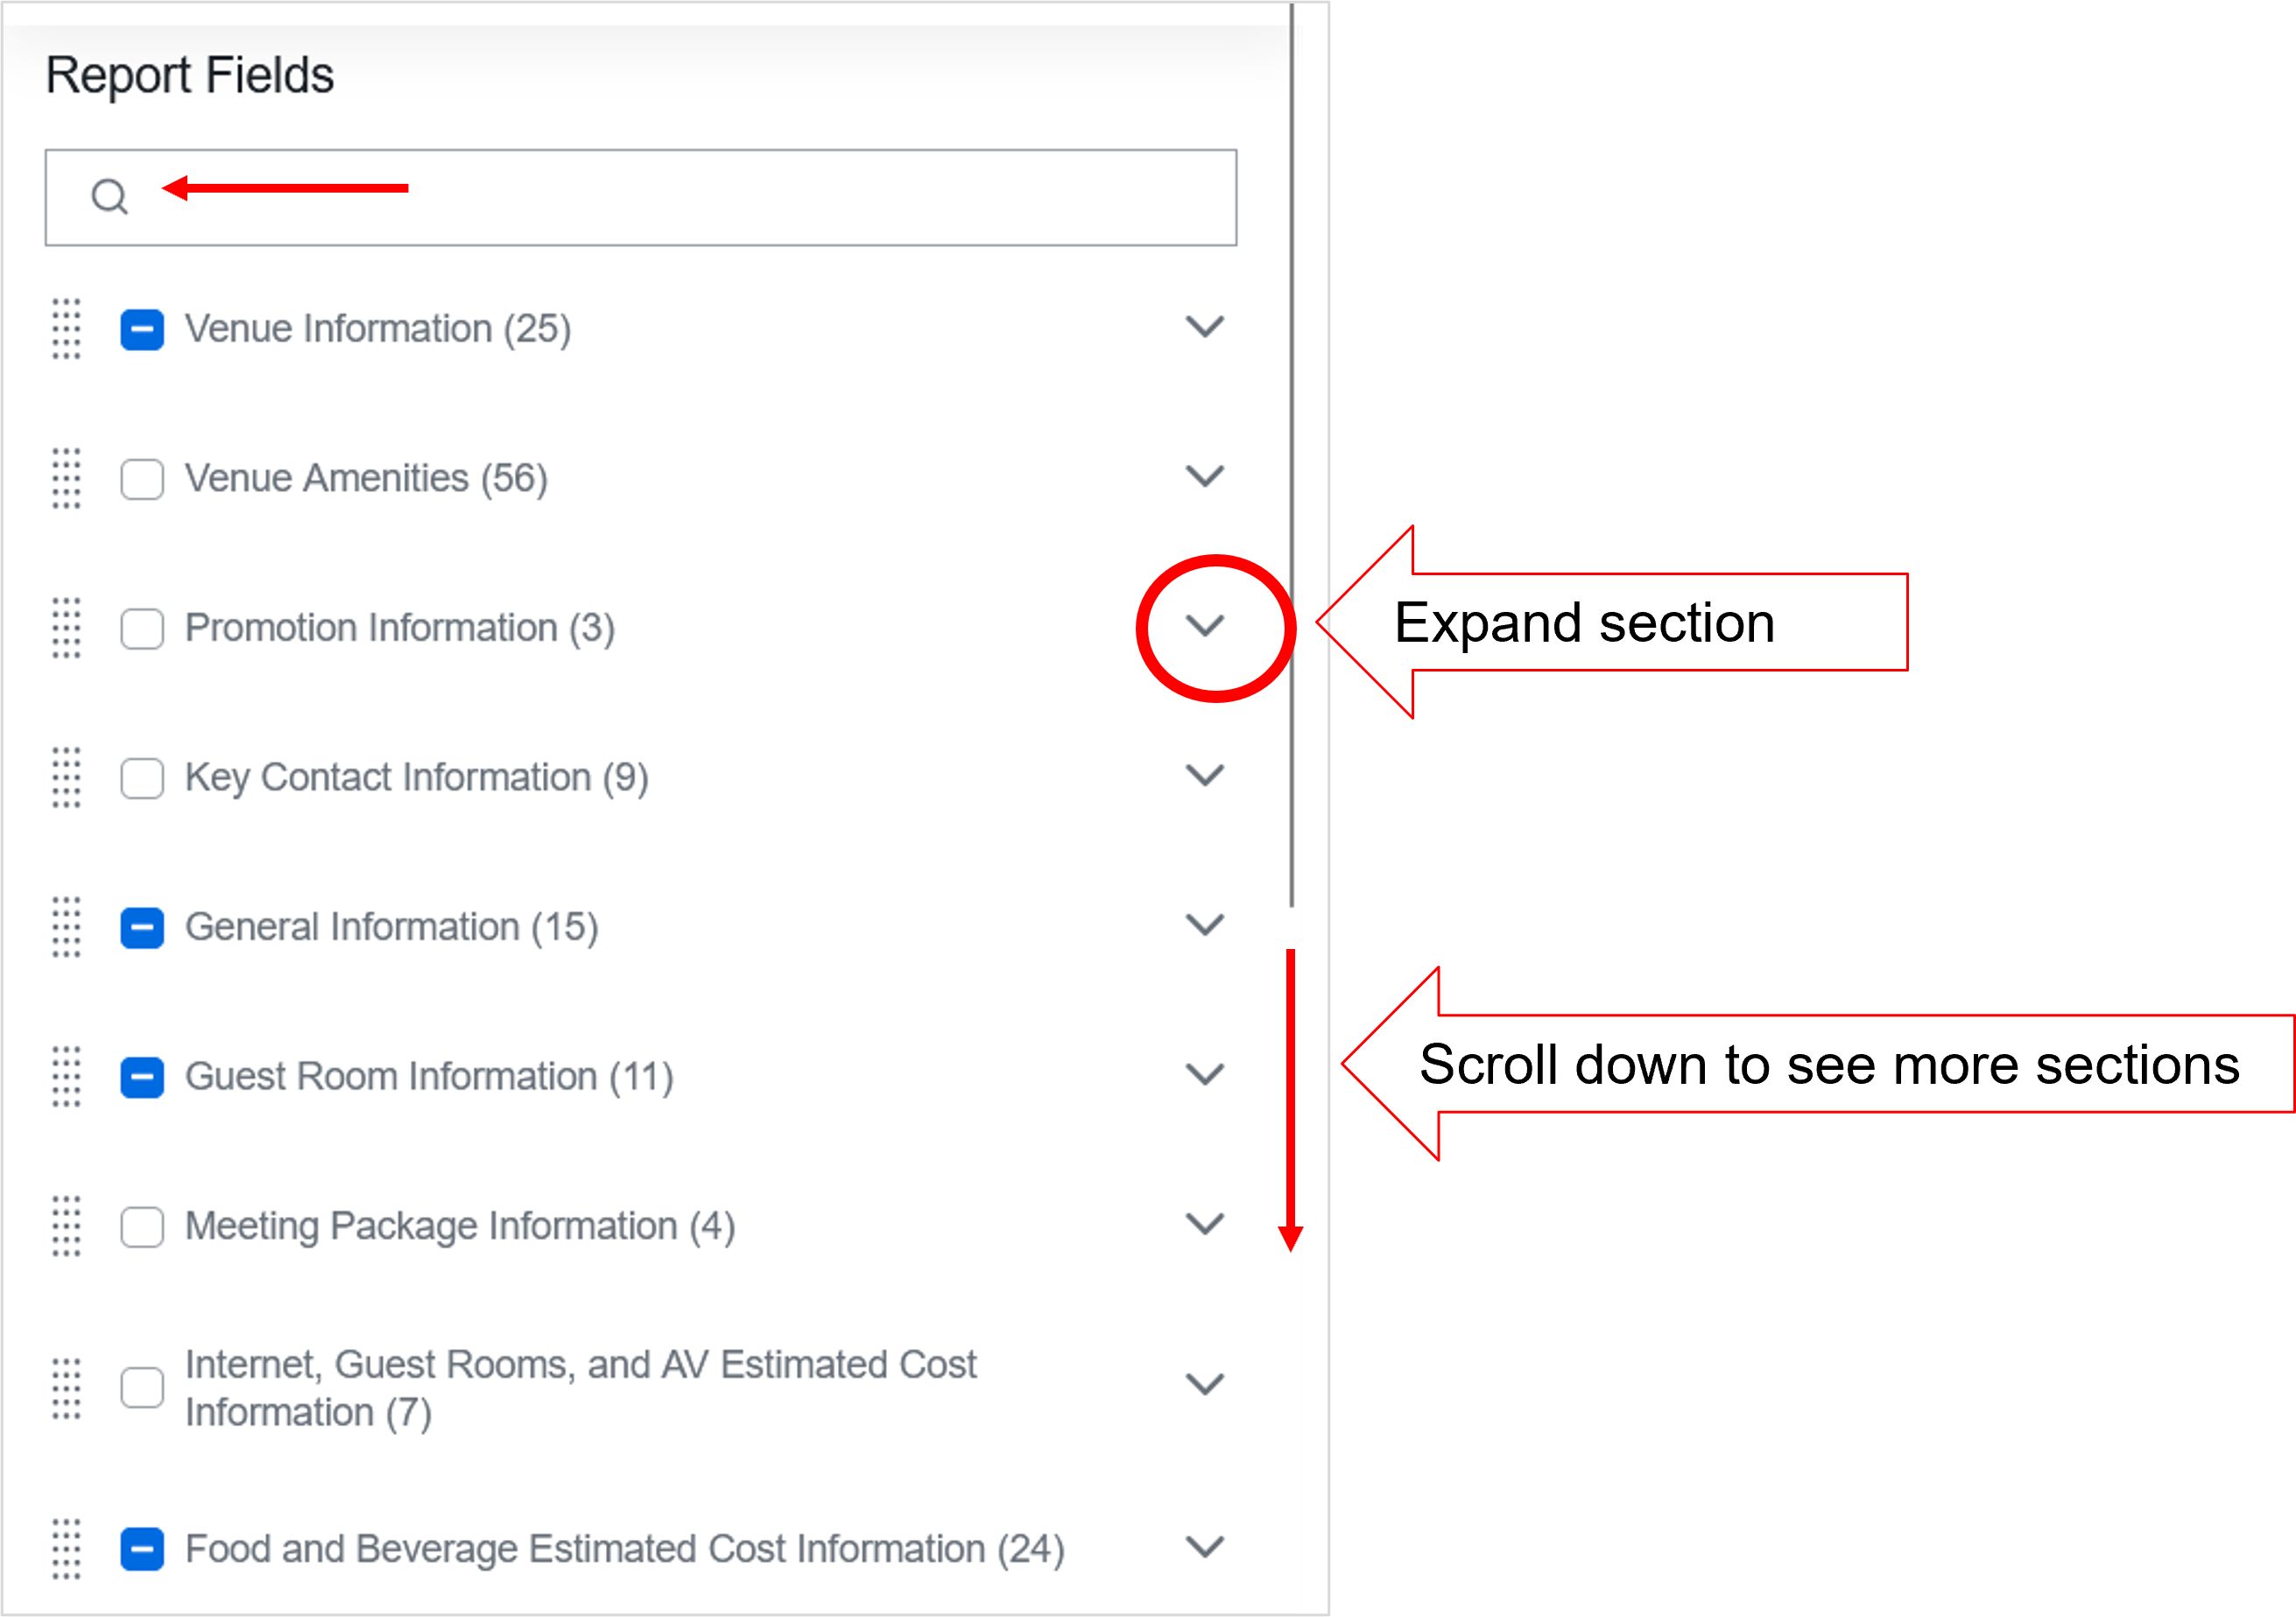
You can uncheck the report fields you don't want to view in your report or you can click the icon next to a field and drag it to the position where you want it to display in the report. Any changes you make will automatically be displayed in the report.

7. Click the X icon next to Edit Page Details when you're done with a specific page.
8. Continue the customization. Select the next page to Edit Page Details. In Submitted Proposal page, be sure to review all report fields. Select or deselect report fields to share (or not share) with the client. You may not want to any mention of the HB Placement Fee agreement in Additional Questions (Custom Questions).
9. Save the report. If you have made any changes to the report settings or report fields, click Save As Template in the top right to keep this version of the report and use it to compare other bids. Enter a name and a short description for the report.
TECH NOTE: To share report visibility, the user/Associate must be in a previously setup
User Group. See this
HB Help article.
10. Click Save or Save as template when you're done.
11. Export the report. Start by clicking
Export in the top right. Enter a name for the Excel spreadsheet and click
Export report.
12. Download and Save the Excel report to your computer. The report will include separate pages/tabs based on the grouping you selected ( e.g. venue status, metro area, or venue type). Make any final touches within Excel, if needed.
13. REUSE the saved custom report template for other RFPs and SHARE with other Associates.